Timesheet allows administrators and managers to create projects and tasks and track the progress of each employee assigned to it, here is how:
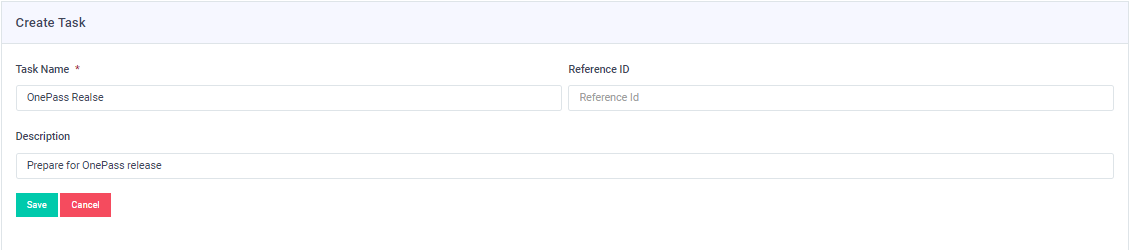
- Start by creating a task by going to Time Tracking > Tasks > Create Task, fill in the information required then Save.
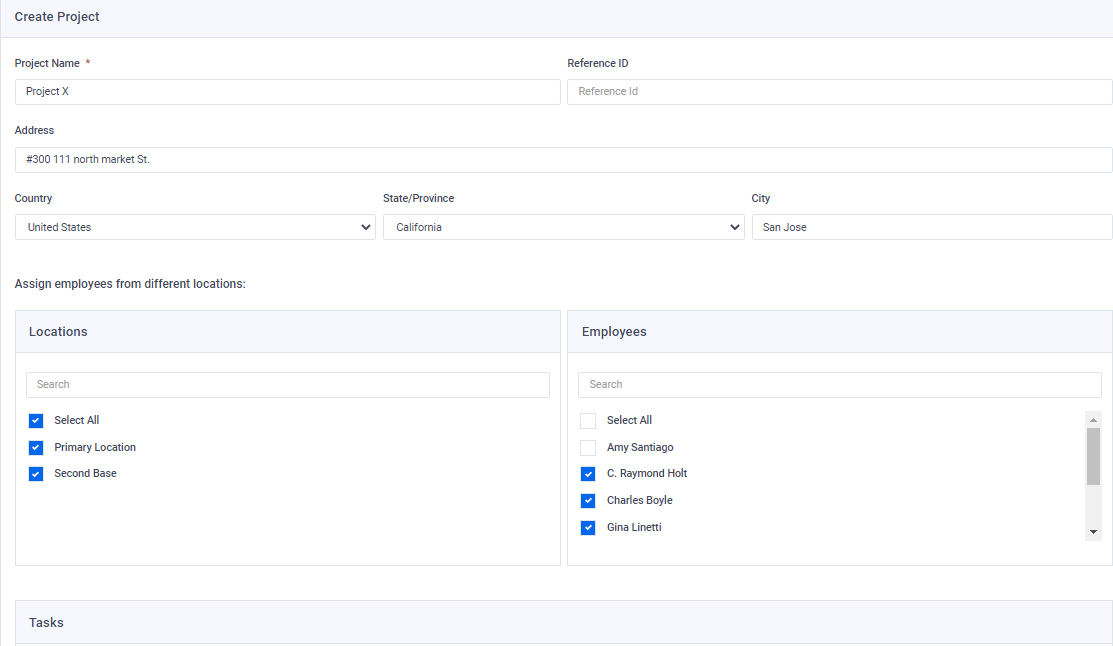
- Create a project by going to Time Tracking > Projects > Create Project, fill in all of the detail, choose the location, employees and tasks then Save.
- Now we are ready to add timesheet for employees we’ve assigned into our project by going to Time Tracking > Timesheet > click add. Choose your employee, user skill, location, project, task, date and time then Save.
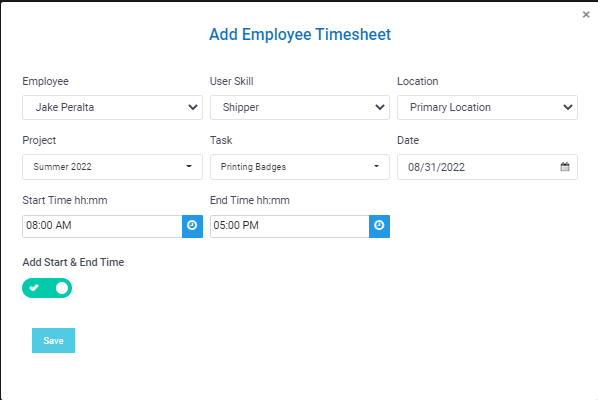
It should look like this: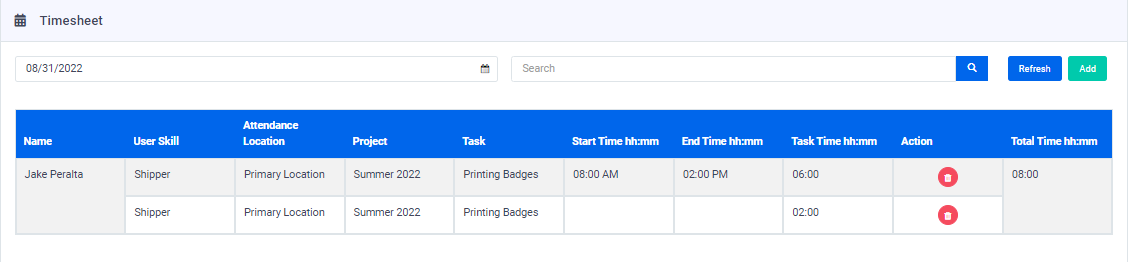
Please Note:
* User skill and location are not mandatory.
* You can add user skill to each user by going to Users > User Skills and create as many skills as you want, to assign a skill to a user visit their profile in Users > All Users > edit the user’s profile and add a skill.
* We have 2 options in the time input, we can either add a start and end time or enter a total time by turning (Add Start & End Time) toggle on or off.
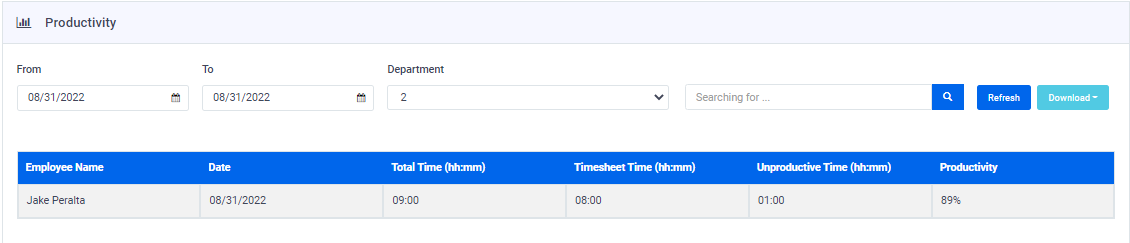
* Employee needs to have a sign in record for the day you wish to add a timesheet record for (either from the kiosk or manually from manage attendance), if there was no attendance recorded for the employee the Save option will be dimmed. - Timesheet records can be filtered by date, department also administrators and managers can track employees productivity hen download the report.