The following features and improvements have been made to SmileMe.In Portal:
Performance improvements and bug fixes.
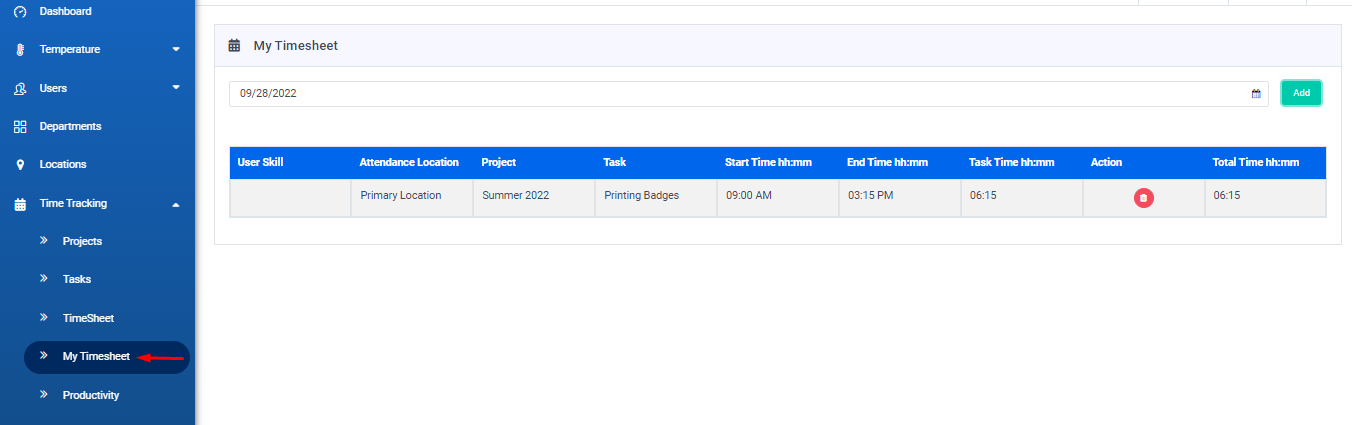
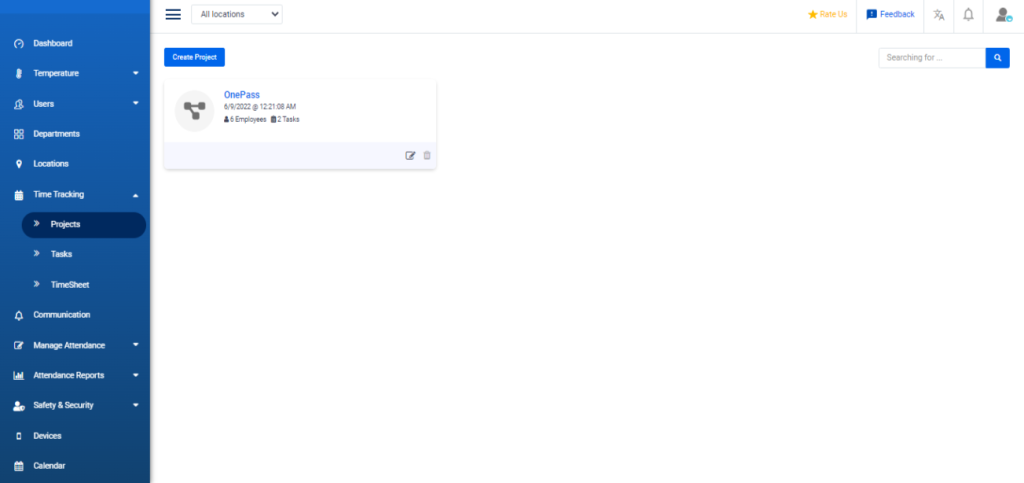
My TimeSheet in the Time Tracking: Introducing “My Timesheet” where users can now enter their own timesheet manually.
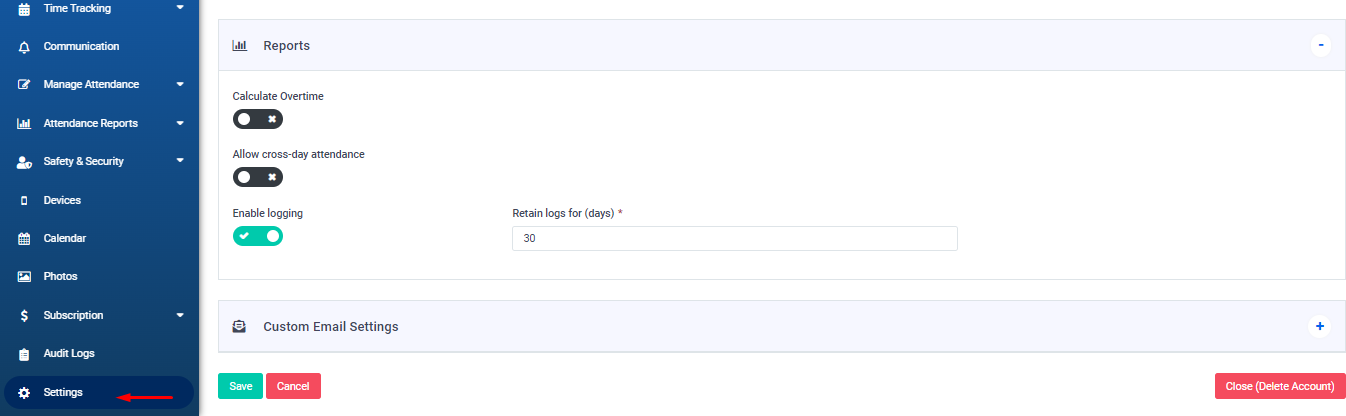
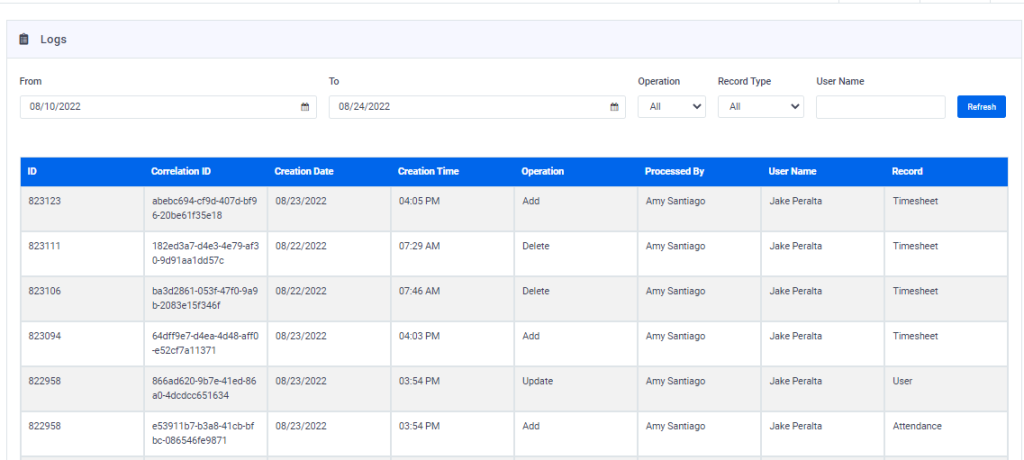
On/Off Audit Logs: – Administrators can now choose whether to keep or delete the records in the Audit Logs tab by turning the option “Enable Logging” On or Off in Settings. They can also decide to keep the records for a set number of days before deleting them. – This option is only available to paid tiers.
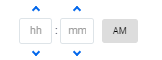
For a better experience, users can now enter the time by typing it in or by selecting it by clicking on the arrows
Timesheet allows administrators and managers to create projects and tasks and track the progress of each employee assigned to it, here is how:
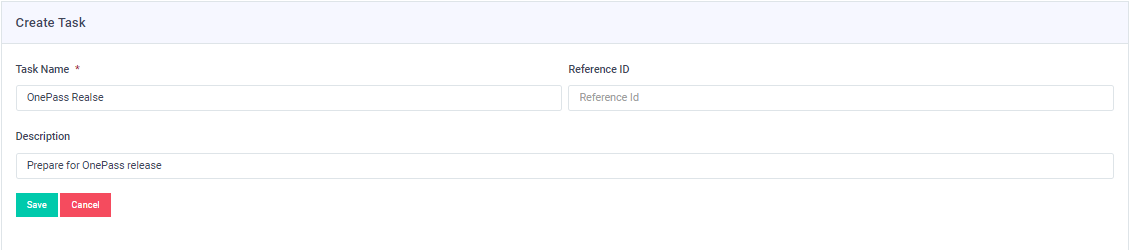
Start by creating a task by going to Time Tracking > Tasks > Create Task, fill in the information required then Save.
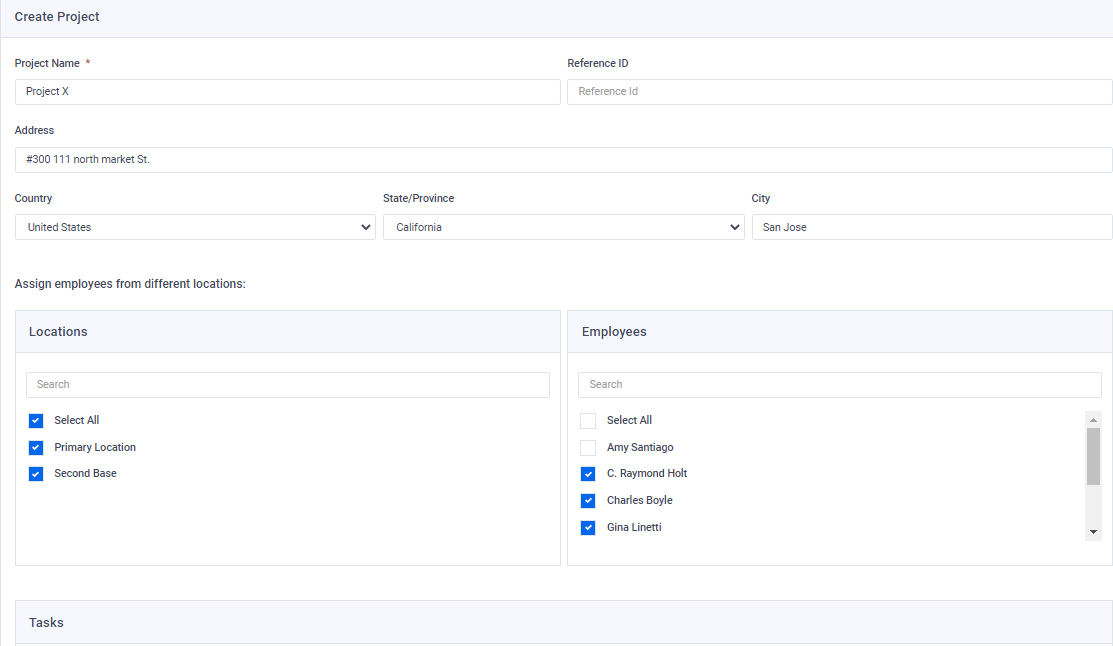
Create a project by going to Time Tracking > Projects > Create Project, fill in all of the detail, choose the location, employees and tasks then Save.
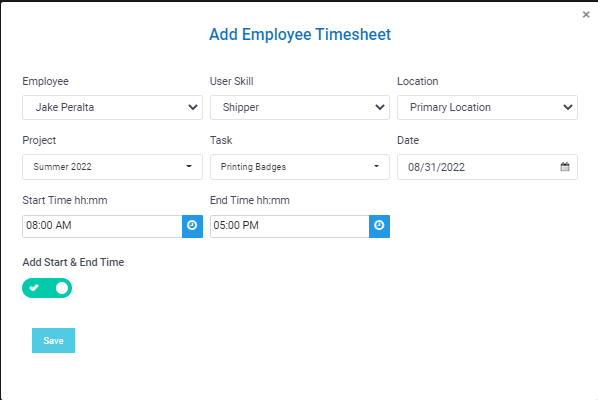
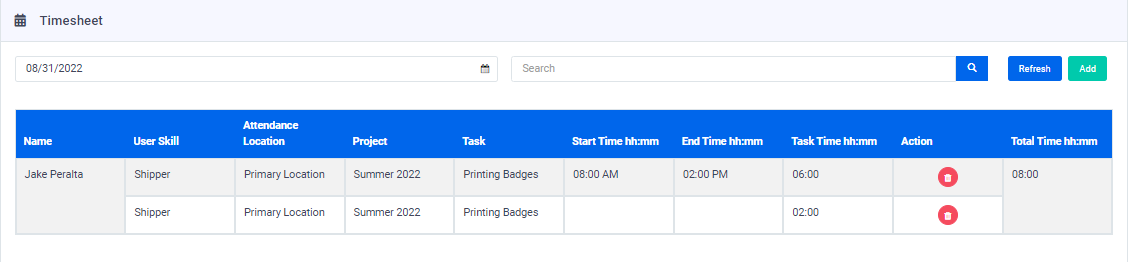
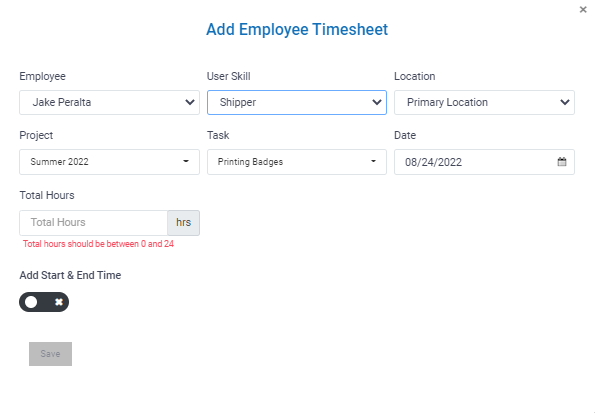
Now we are ready to add timesheet for employees we’ve assigned into our project by going to Time Tracking > Timesheet > click add. Choose your employee, user skill, location, project, task, date and time then Save.
It should look like this:
Please Note: * User skill and location are not mandatory. * You can add user skill to each user by going to Users > User Skills and create as many skills as you want, to assign a skill to a user visit their profile in Users > All Users > edit the user’s profile and add a skill. * We have 2 options in the time input, we can either add a start and end time or enter a total time by turning (Add Start & End Time) toggle on or off. * Employee needs to have a sign in record for the day you wish to add a timesheet record for (either from the kiosk or manually from manage attendance), if there was no attendance recorded for the employee the Save option will be dimmed.
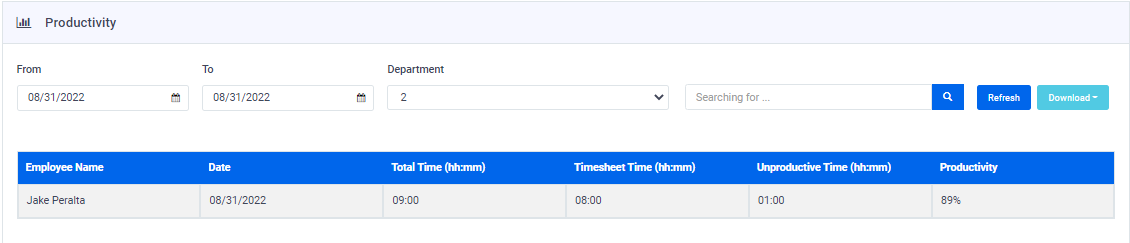
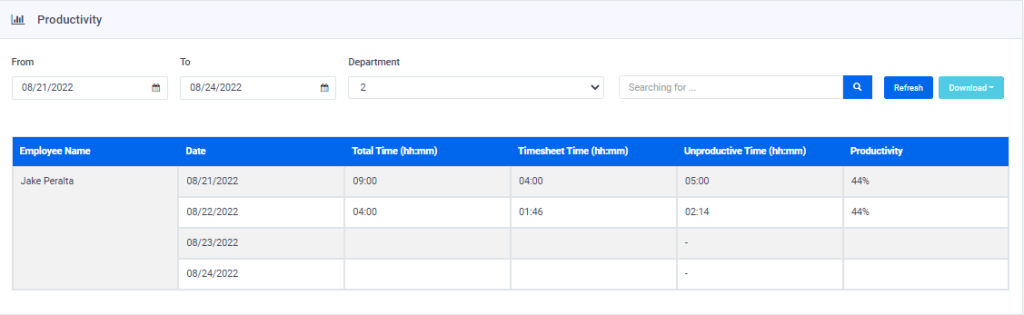
Timesheet records can be filtered by date, department also administrators and managers can track employees productivity hen download the report.
The following features and improvements have been made to the SmileMe.In Portal:
Performance improvements and bug fixes.
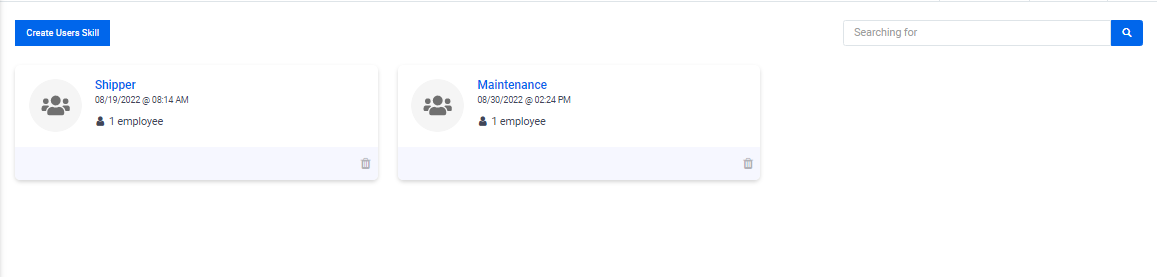
New “Users Skills” option in “Users” tab: To add skills that can be assigned to users in the timesheet.
In “Time Tracking” tab:
Administrators can assign skills to each employee, add a total duration of the employee’s work period, or enter specific start and end times.
New Productivity tab: Administrators and managers can track the productivity of employees in projects and download all their timesheet records in excel or a PDF form within a specified date range.
“Audit Logs” tab:
Any changes or updates made by administrators on users, attendance or timesheet are now recorded under the Audit logs tab.
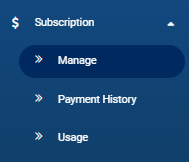
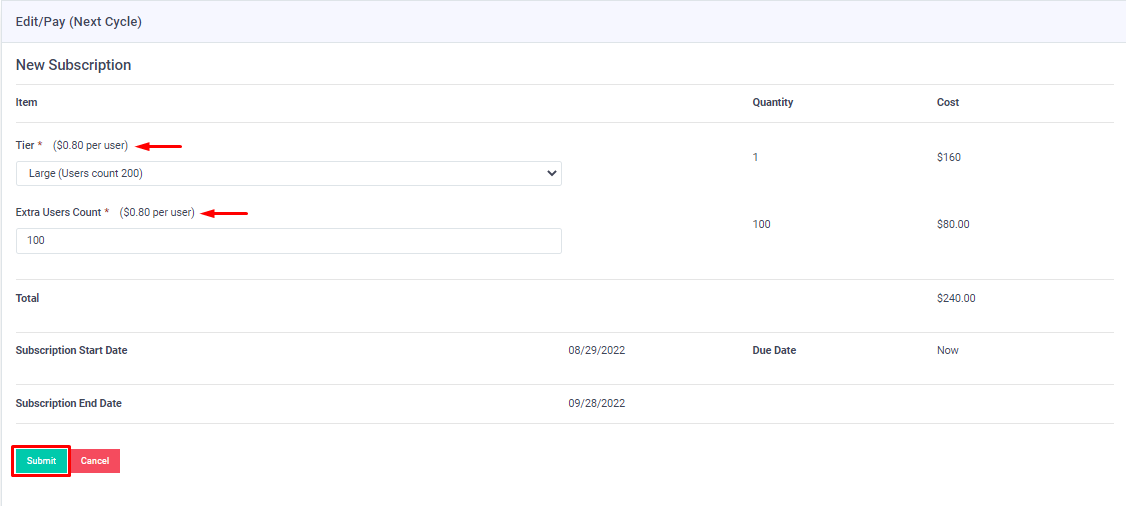
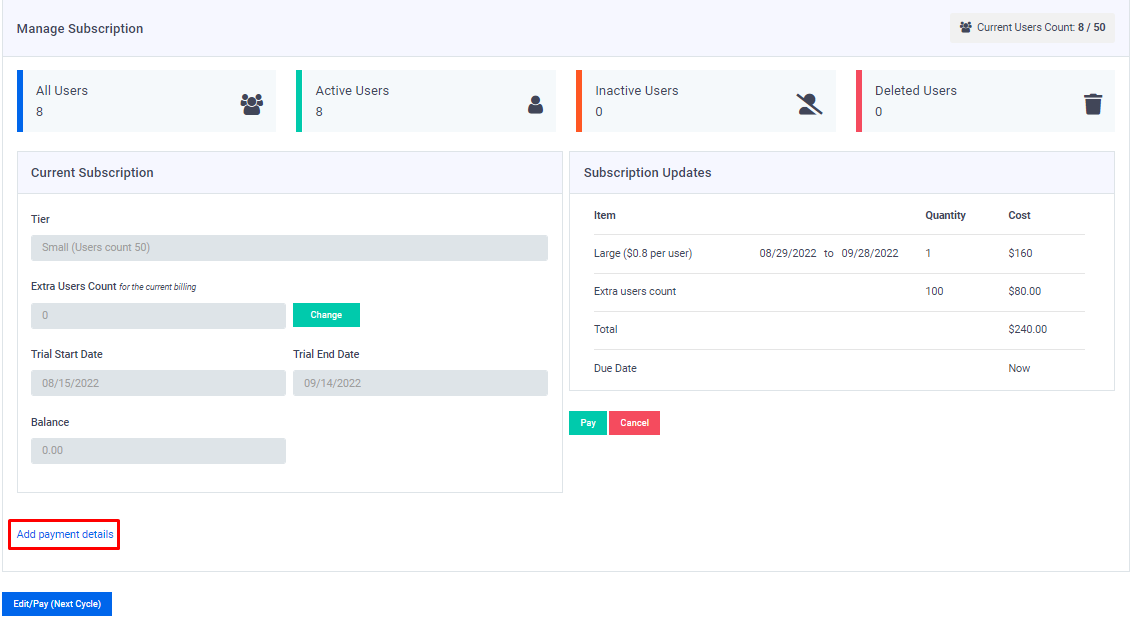
To change your plan to a higher or a lower plan or add additional users please follow the below steps:
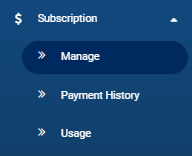
Go to (Manage) under (Subscription).
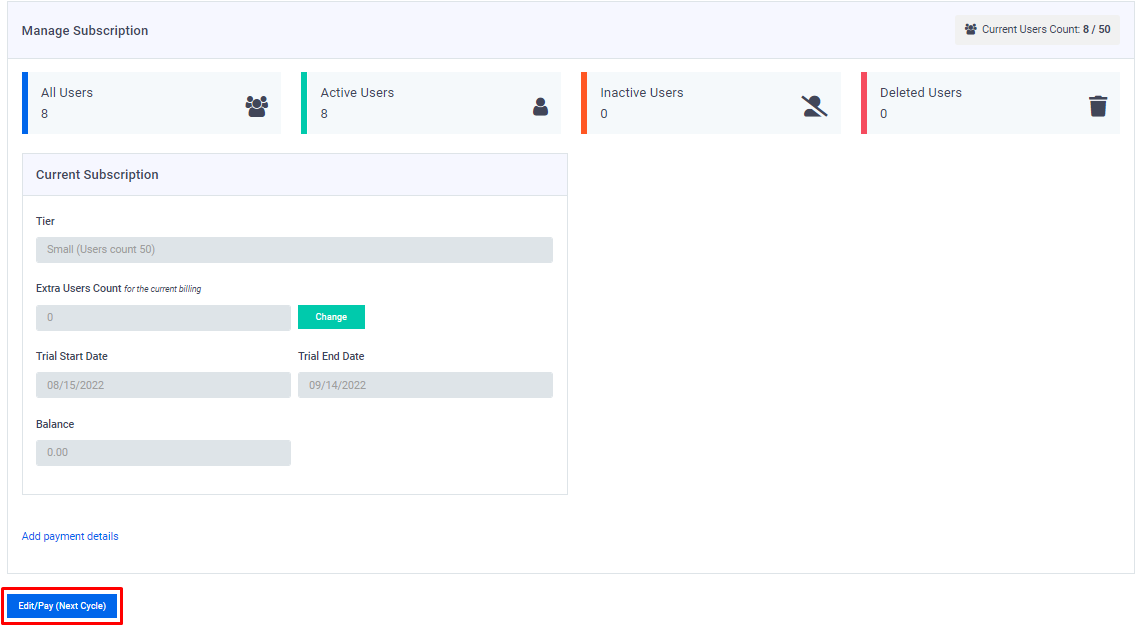
In Manage subscription, click on Edit/Pay (next cycle)
Choose the tier you would like to be on, if the user count is more than what the plan offers you can add additional users or you can type 0, then click on Submit. – If you wish to only add additional users, make sure to not change the tier and only add the number of users you wish to add.
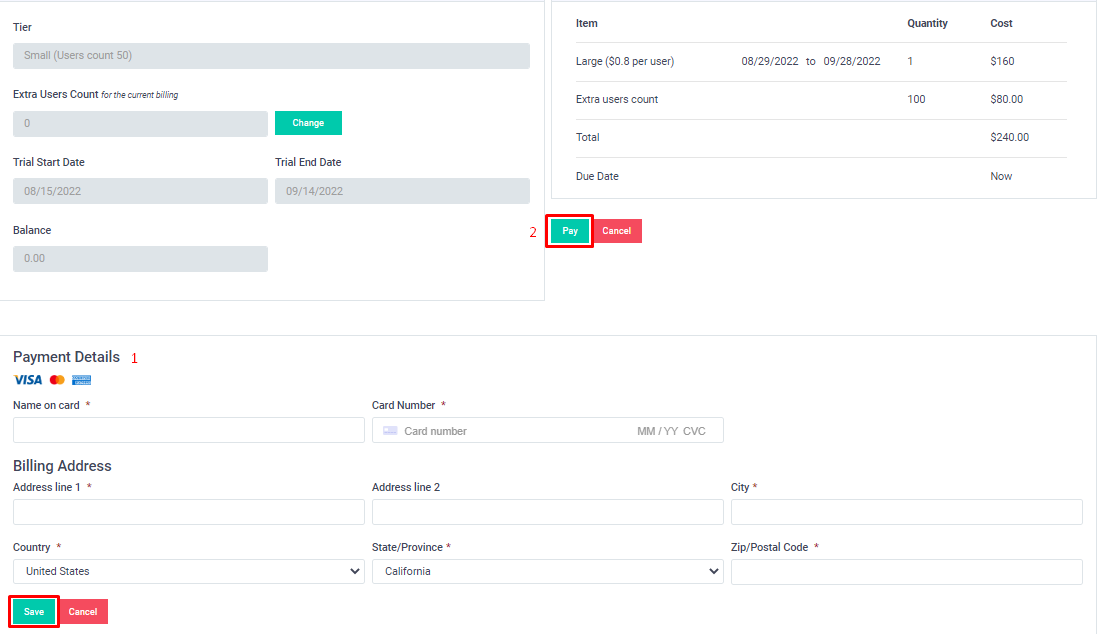
If the payment method isn’t set up click on (Add payment details) to add it or continue to step number 5.
After filling out and saving the card details click on (Pay).
Payment will be deducted on the spot and the new plan will kick in immediately. You can also set up automated renewal by activating the (Auto Renewal) Toggle
If you face any issues please reach out to our support team at Support@facegraph.com
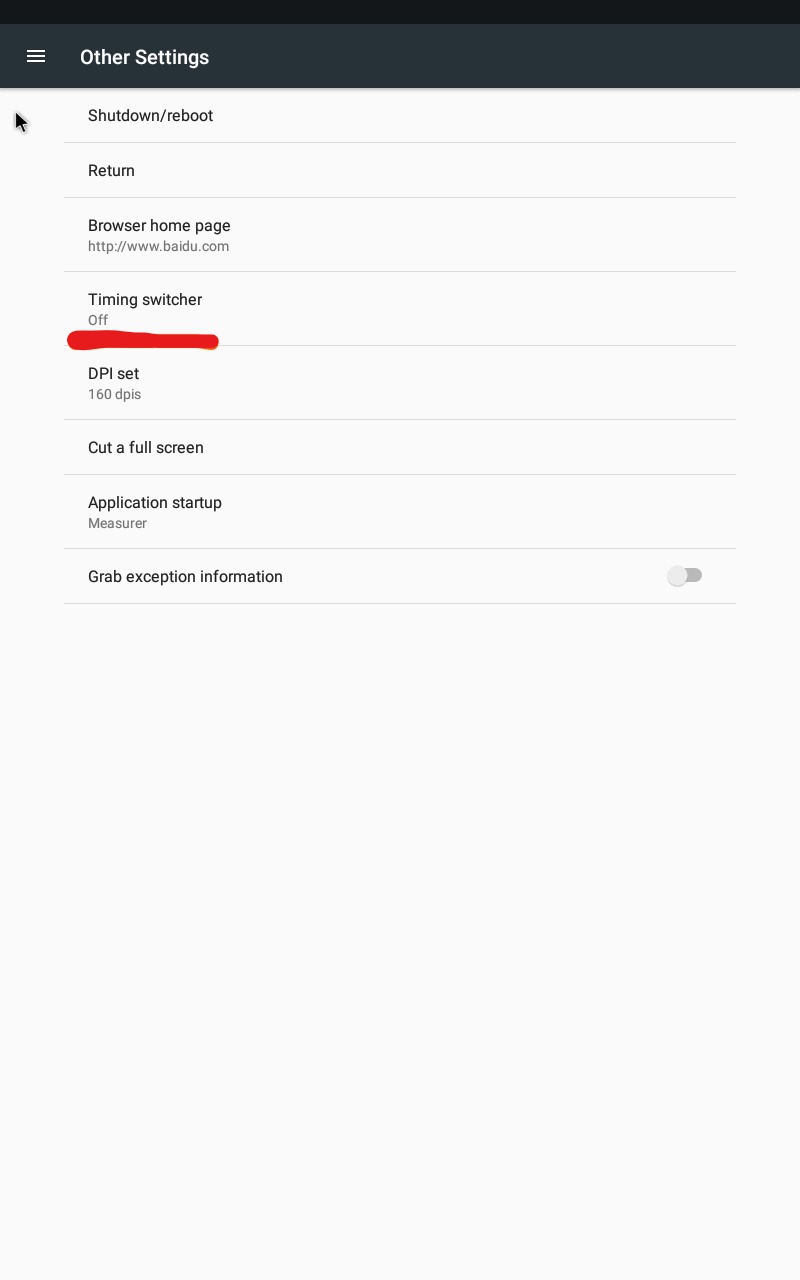
If you wish to set your thermal device to shutdown and reboot at the time you choose please follow these steps:
Go to Settings (the gear icon)
2. Go to “Other Settings”
3. Click on “Timing switcher”.
4. Activate “Timer Switch” toggle. then set the preferred shutdown time and the boot time (based on your time zone), if you wish rebooting to happen every day make sure to mark all days under repeat.
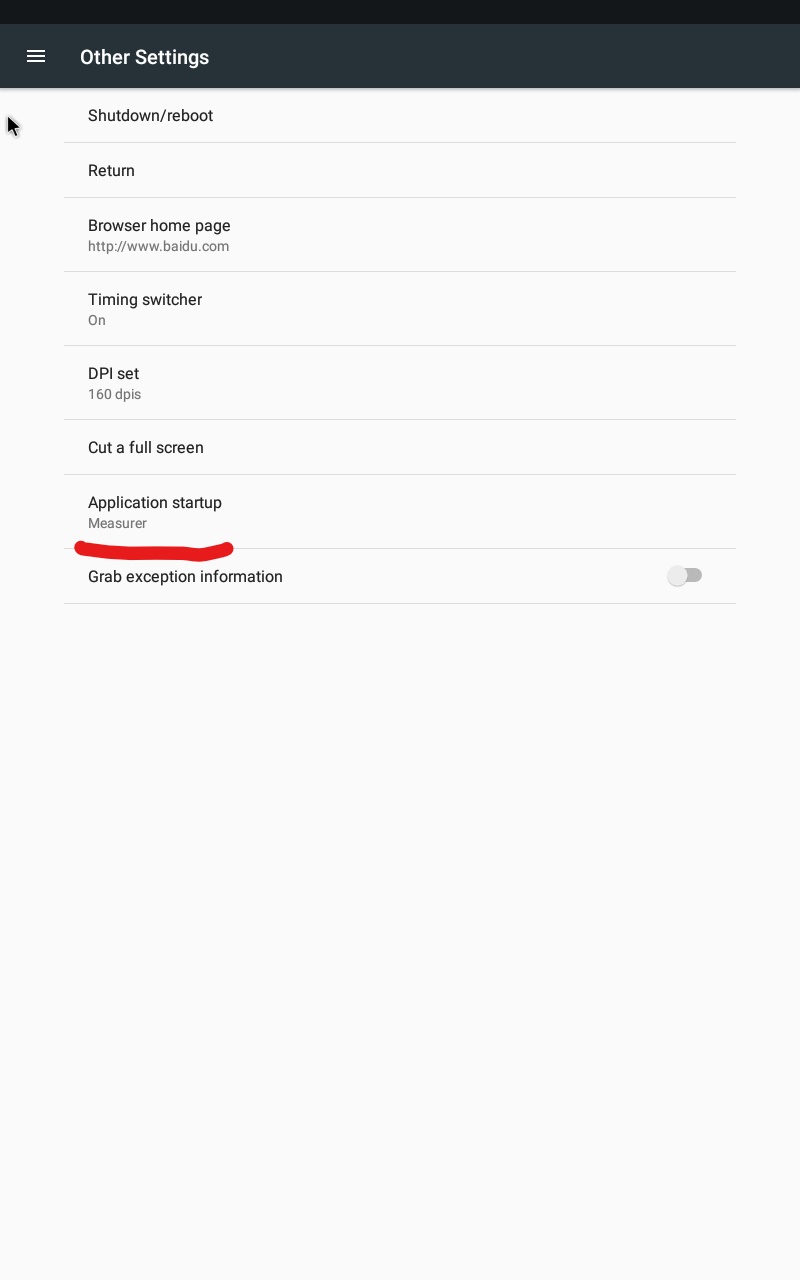
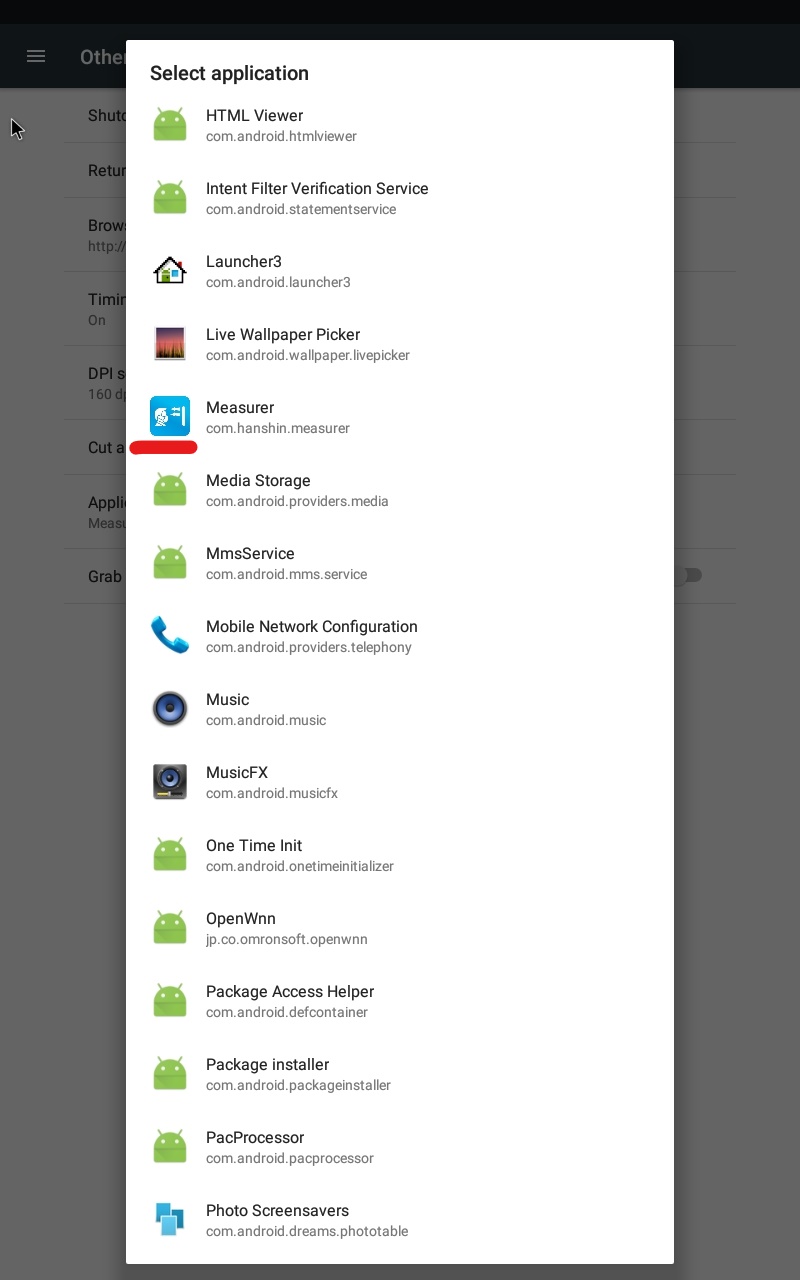
5. Going back to “Other settings” go to “Application Startup”
make sure to choose “Measurer”.
Now the device is going to reboot at the chosen time you’ve set and the FaceGraph app will launch right after.
If you are using one of our health questionnaire devices and are looking for a way to customize the questions on your device, here are the detailed steps of how you can achieve that:
1. You will need to download one of the photos found below and write your question on it. Save the changes and rename the photo according to the order in which you want the question to appear.
For example, if you want your question to be shown first, go ahead and name the photo “1.png,” but if you want it to be shown as the 3rd question, name the photo “3.png”.
2. Next is a particularly major step, copy the photo onto a USB drive and place it in a folder titled “Questions.”
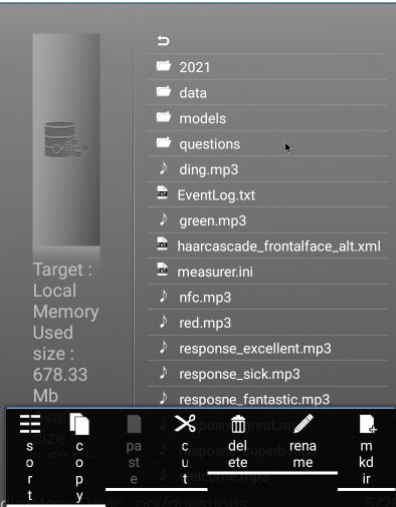
3. Plug the USB into your health questionnaire device, head over to file manager > local memory > eHanshin as shown in the below image.
4. While in that folder, long click the already existing “Questions” folder and delete. This step is to be able to replace it with the new one containing the customized questions.
5. Go back and open the USB folder from the device, long click and copy. Return to the folder “eHanshin,” long click on any file or folder, then click paste.
Finally, go to the Hanshin measurer App and you will find the questions you have customized and added.
1. Plug in a mouse, click with the right button to exit the measure app.
2. Go to Settings (the gear ⚙️ icon) then Wi-Fi. Make sure you’re connected to a network.
– If it keeps on showing “saved” please click on forget the network and connect again and make sure you’re entering the correct Wi-Fi password.
3. Got to the Browser and try going to any website to see if the internet is working. If you can’t access any website move to the next step.
4. Try connecting the FaceGraph device with an Ethernet cable, go to the Browser then try accessing any website. If you can’t access any website move to the next step
5. Make sure your Wi-Fi connection is 2.4Ghz (Wi-Fi 5Ghz is not supported), also your network encryption should be WPA2, if it’s WPA or WPA3 please contact your IT desk to change it to WPA2.
6. If your Wi-Fi is still not working, please contact our customer support on +1 408-337-2013 or email Support@facegraph.com.